
Maker Store Halloween Project: Uncanny Eyes


Click to Expand
Bill of Materials
Hardware
(Not all products are available for purchase in the US store.)
| Qty. | Hardware Required | Price (USD$) |
|---|---|---|
| 1x | ESP32-WROOM-32 | / |
| 2x | 1.28″ TFT LCD Display Module Round RGB 240*240 | / |
| 1x | Male to Female Jumper Cable – 2.54MM Dupont (20cm) (40 Pack) | / |
| 1x | USB A to Micro USB Cable 0.5M | / |
| 1x | Multilayer HDPE Sheet 18mm (MAT-HDPE-18MM-RD-BK) A4 Size | / |
| 1x | 3.175mm 2 Flute Up Cut Carbide End Mill (BIT-ECFU-3D175-3D175-17-38-2F-U-008) | / |
| 1x | 0.3 x 6mm x30° 1 Flute Carbide V Bit for Engraving (BIT-VCVU-6-0D3-30-45-1F-V-032) | / |
| 1x | 6mm 2 Flute Up Cut Carbide End Mill (BIT-ECFU-6-6-25-60-2F-U-219) | / |
| 1x | M5 Cap Head Shoulder Bolt (HARD-SBOLT-M5-CAP-040-10PC) (10 Pack) | / |
| 1x | M5 Cap Head Bolt (BOLT-M5-CAP-045-10PC) | $4.45 |
Software & Downloads
- Arduino IDE
- TFT_eSPI Library
- Uncanny Eyes Halloween Skull Code
- CNC Machine G-Code
- Sugar Skull Step File
Step 1: Download & Setup Arduino IDE and Code
1. Download and install the Arduino IDE from the official Arduino website.
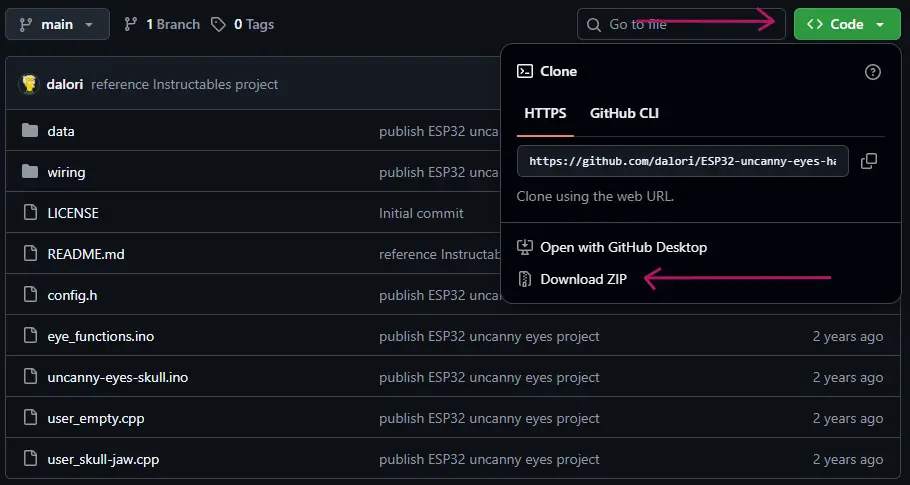
2. Download the ESP32-uncanny-eyes-halloween-skull code from the GitHub repository:
a) Click the green “Code” button on GitHub.
b) Select “Download ZIP” to get all necessary files.
3. Open Arduino IDE
Step 2: Configure Arduino IDE for ESP32 and Libraries
1. Add the ESP32 board support to the Arduino IDE following the official ESP32 guide.
2. Select “ESP32 Dev Module” as the board in Arduino IDE.
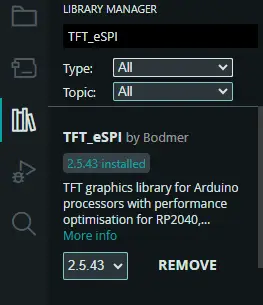
3. Install the TFTeSPI library through the Library Manager:
a) Navigate to Tools > Libraries or use the Library Manager button on the left sidebar.
b) Modify the TFT_eSPI library configuration:
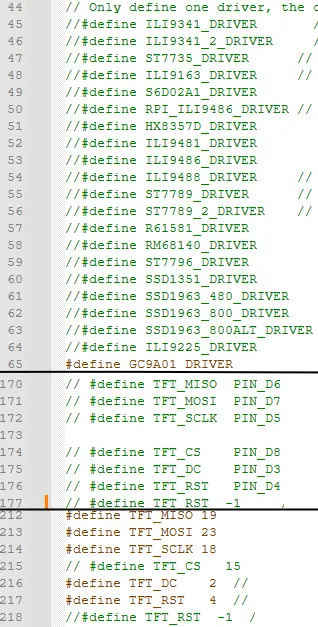
c) Open the UserSetup.h file in the Arduino libraries folder (usually in Documents/Arduino/libraries/).
d) Comment out (by adding //to the beginning of the line) and uncomment lines (by removing the //) to match your hardware setup. For our recommended displays:
-
-
- Comment out
#define ILI9341DRIVER - Uncomment
#define GC9A01DRIVER - Comment and uncomment various pin definitions as instructed (lines 170-177 commented, lines 212-214 and 216-217 uncommented).
- Leave line 215 commented.
- Comment out
-
4. Extract the downloaded code ZIP file to your chosen folder.
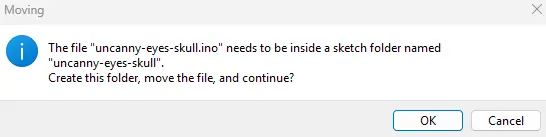
5. Open uncanny-eyes-skull.ino in Arduino IDE
a) Confirm to create a new folder for this sketch.
b) Move all other related files into this new folder for easy access.

6. Open and edit config.h:
a) Define chip select pins (TFT1_CS and TFT2_CS) for each eye display.
b) Enable one graphics eye table by uncommenting the preferred eye style.
-
- Only the
default_large.heyes will work for our recommended 240px TFT Display. - If you have a 120px display you can use all other eyes except for
default_large.h
- Only the
c) Adjust hardware settings such as number of screens, screen rotations, and eye image positions.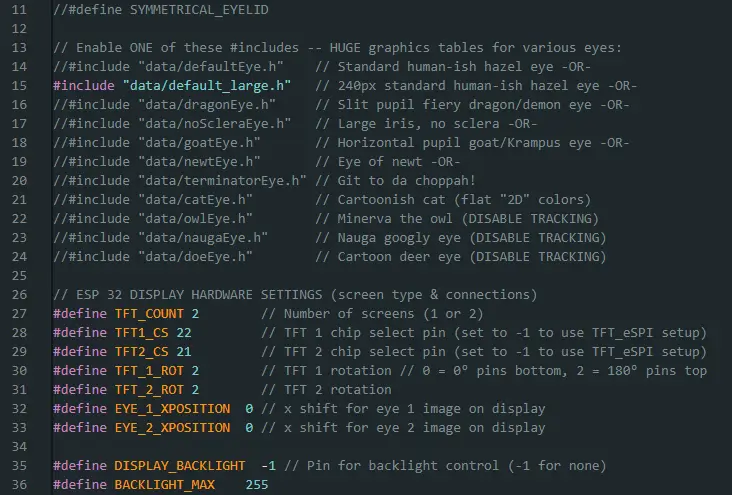
7. Flash the code onto the ESP32 device. Using the arrow.
Step 3: Wiring the TFT Displays
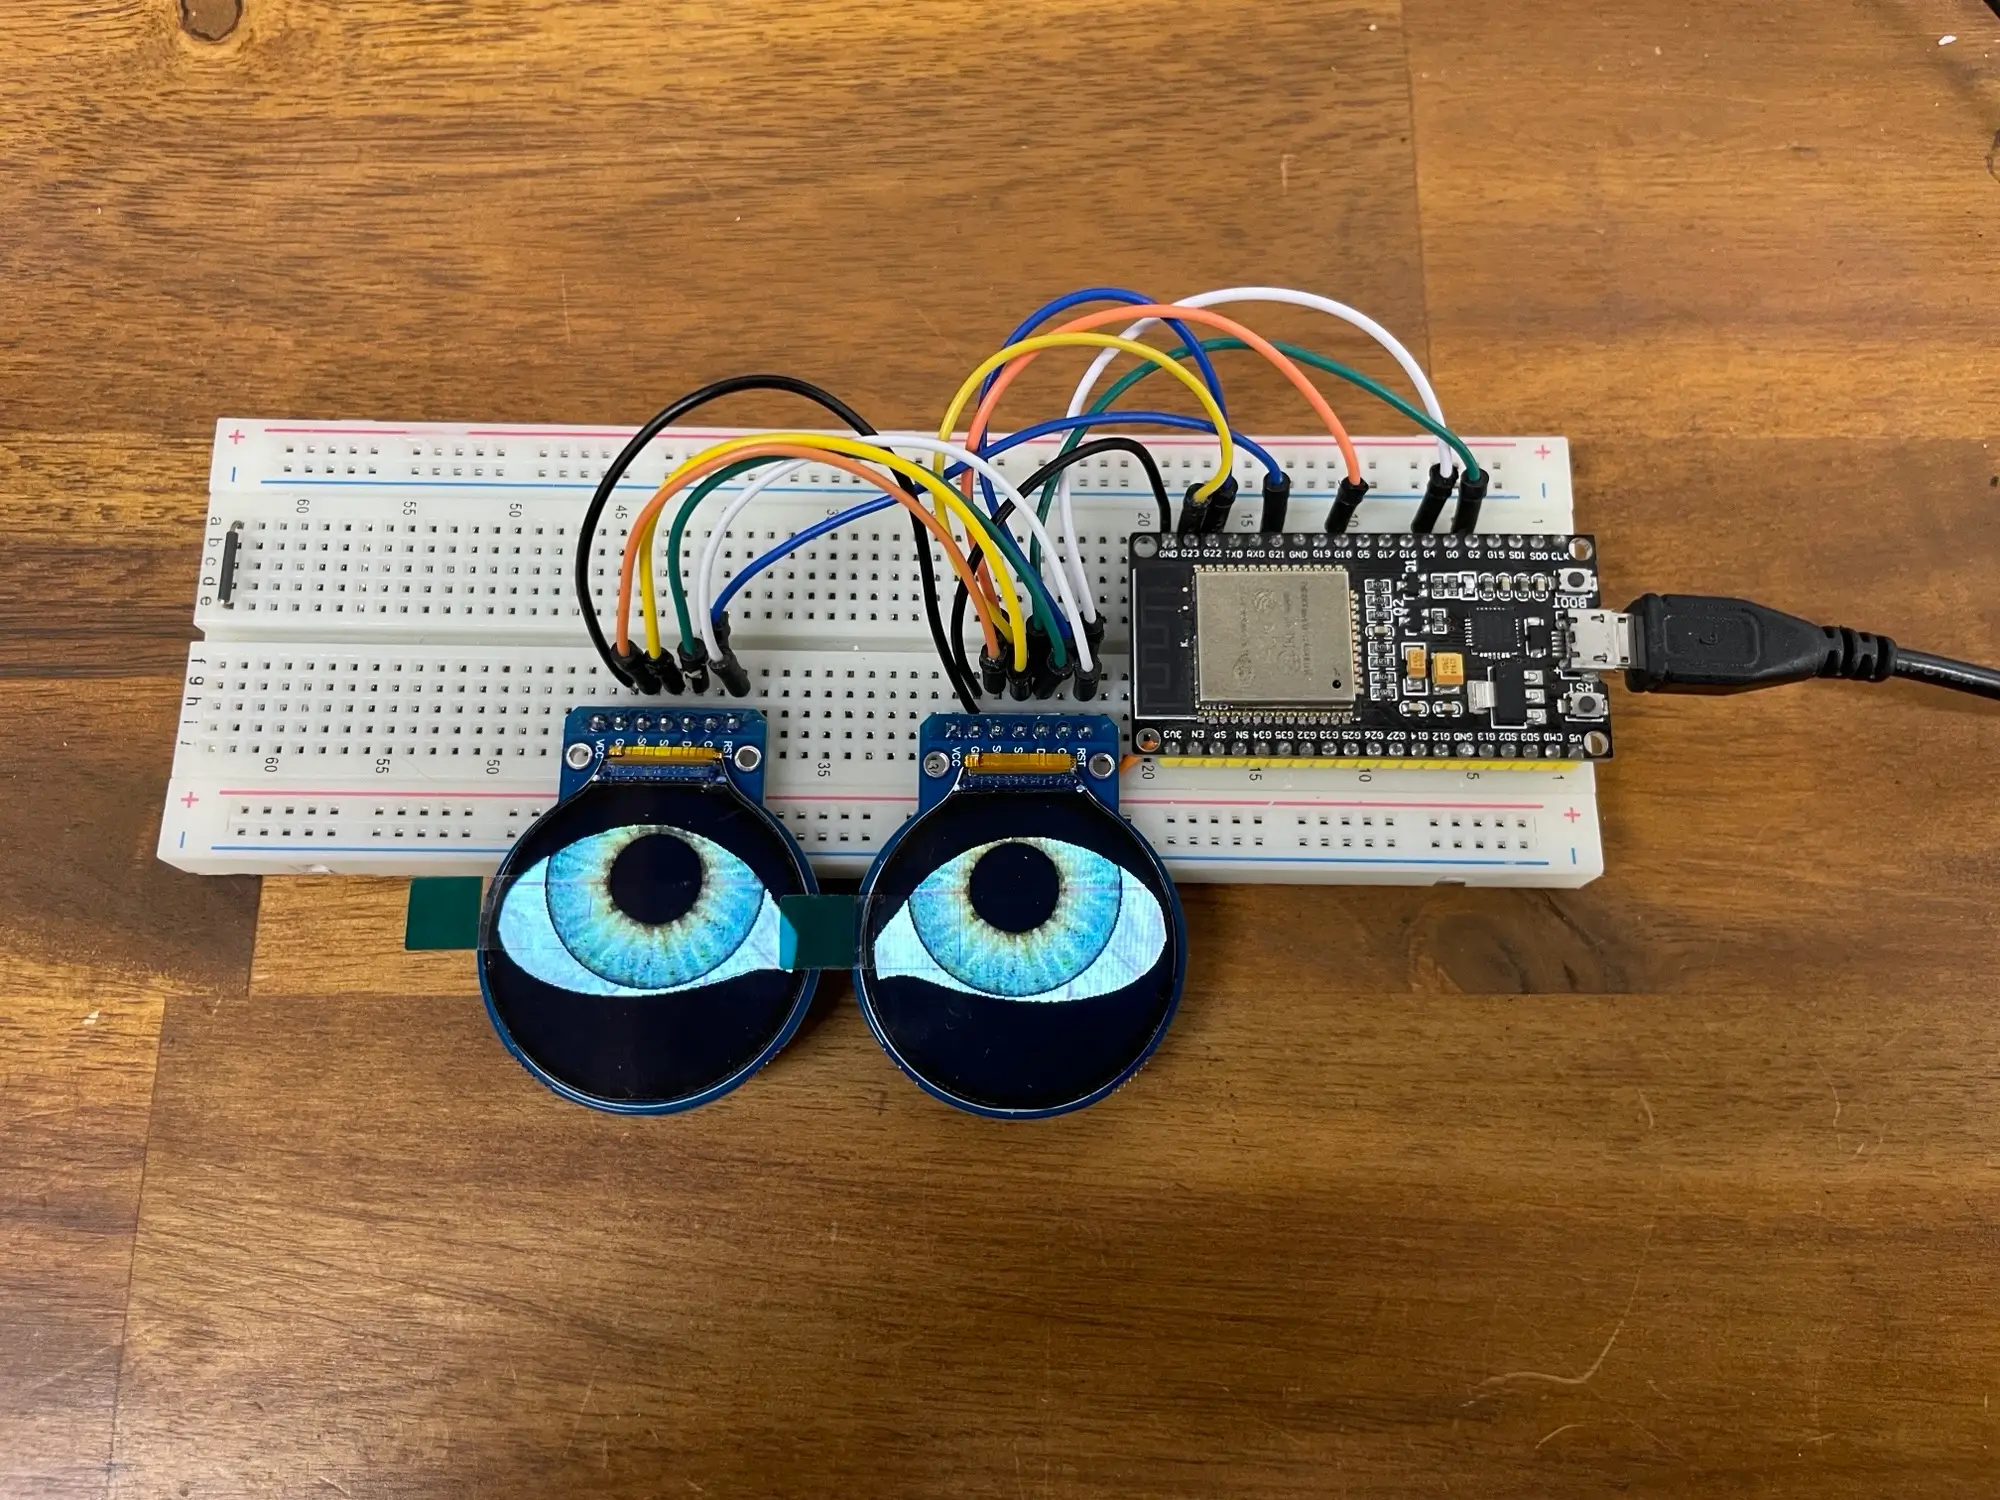
TIP: You can test the connections on a breadboard to ensure everything works before soldering.
config.h settings.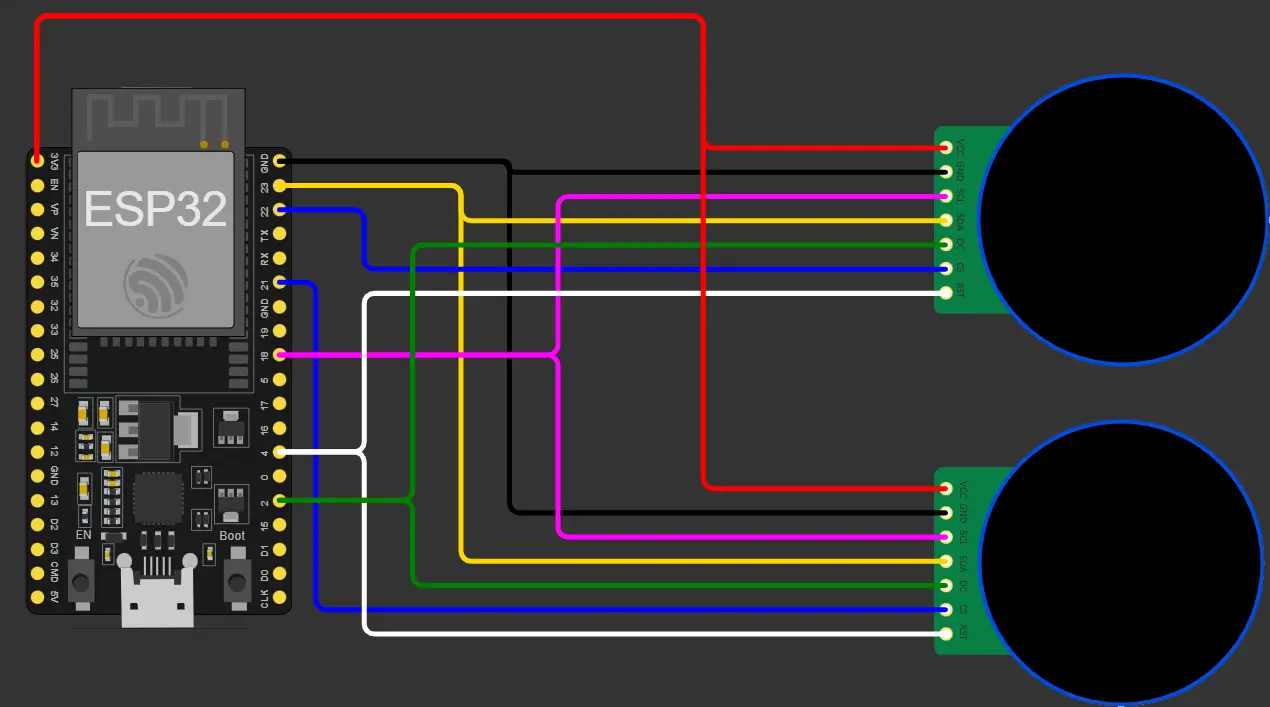
Step 4: CNC Cutting the Sugar Skull
1. Cut your HDPE sheet (A4) into two A5 pieces. You will only need one of them.
2. Drill four M4 holes 8mm from the corners for alignment and fixation.
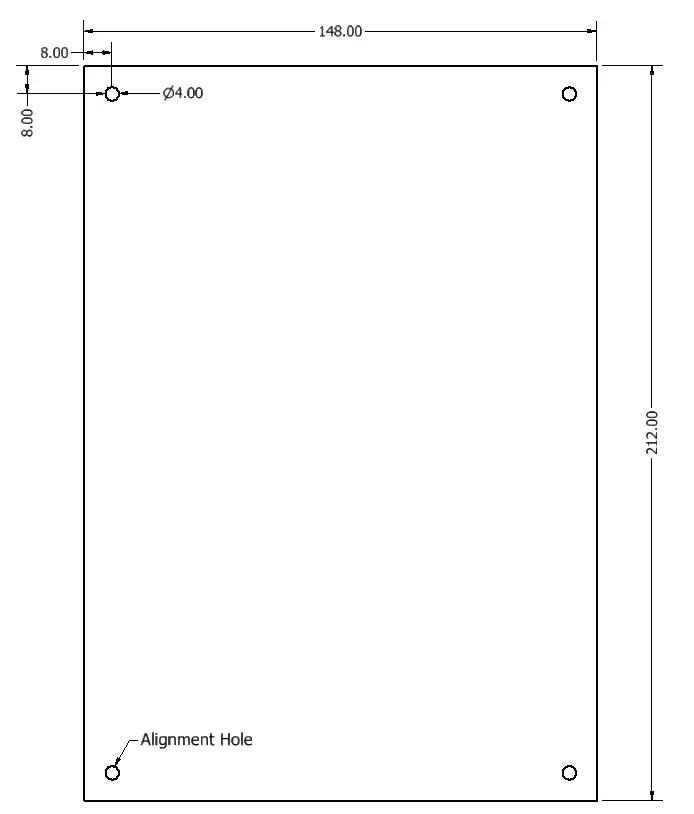
3. Screw down the piece on the CNC table, leaving the bottom left hole free for end mill alignment.
4. Insert the appropriate end mill into the spindle.
5. Calibrate CNC axes carefully:
a) Jog the machine until the end mill is directly above the centre of the alignment hole, then zero the X and Y axes.
b) Set Z-axis probing 0.5mm below the surface to avoid uneven cutting.
6. Run the cutting files in order:
a) 1 - 3mm Bit Rough 008.nc using the 3.175mm end mill (#008)
b)2 - Engraving 032.nc using the 0.3 x 6mm x 30° V Bit (#032)
c)3 - 6mm Out Tabs 219.nc using the 6mm end mill (#219)
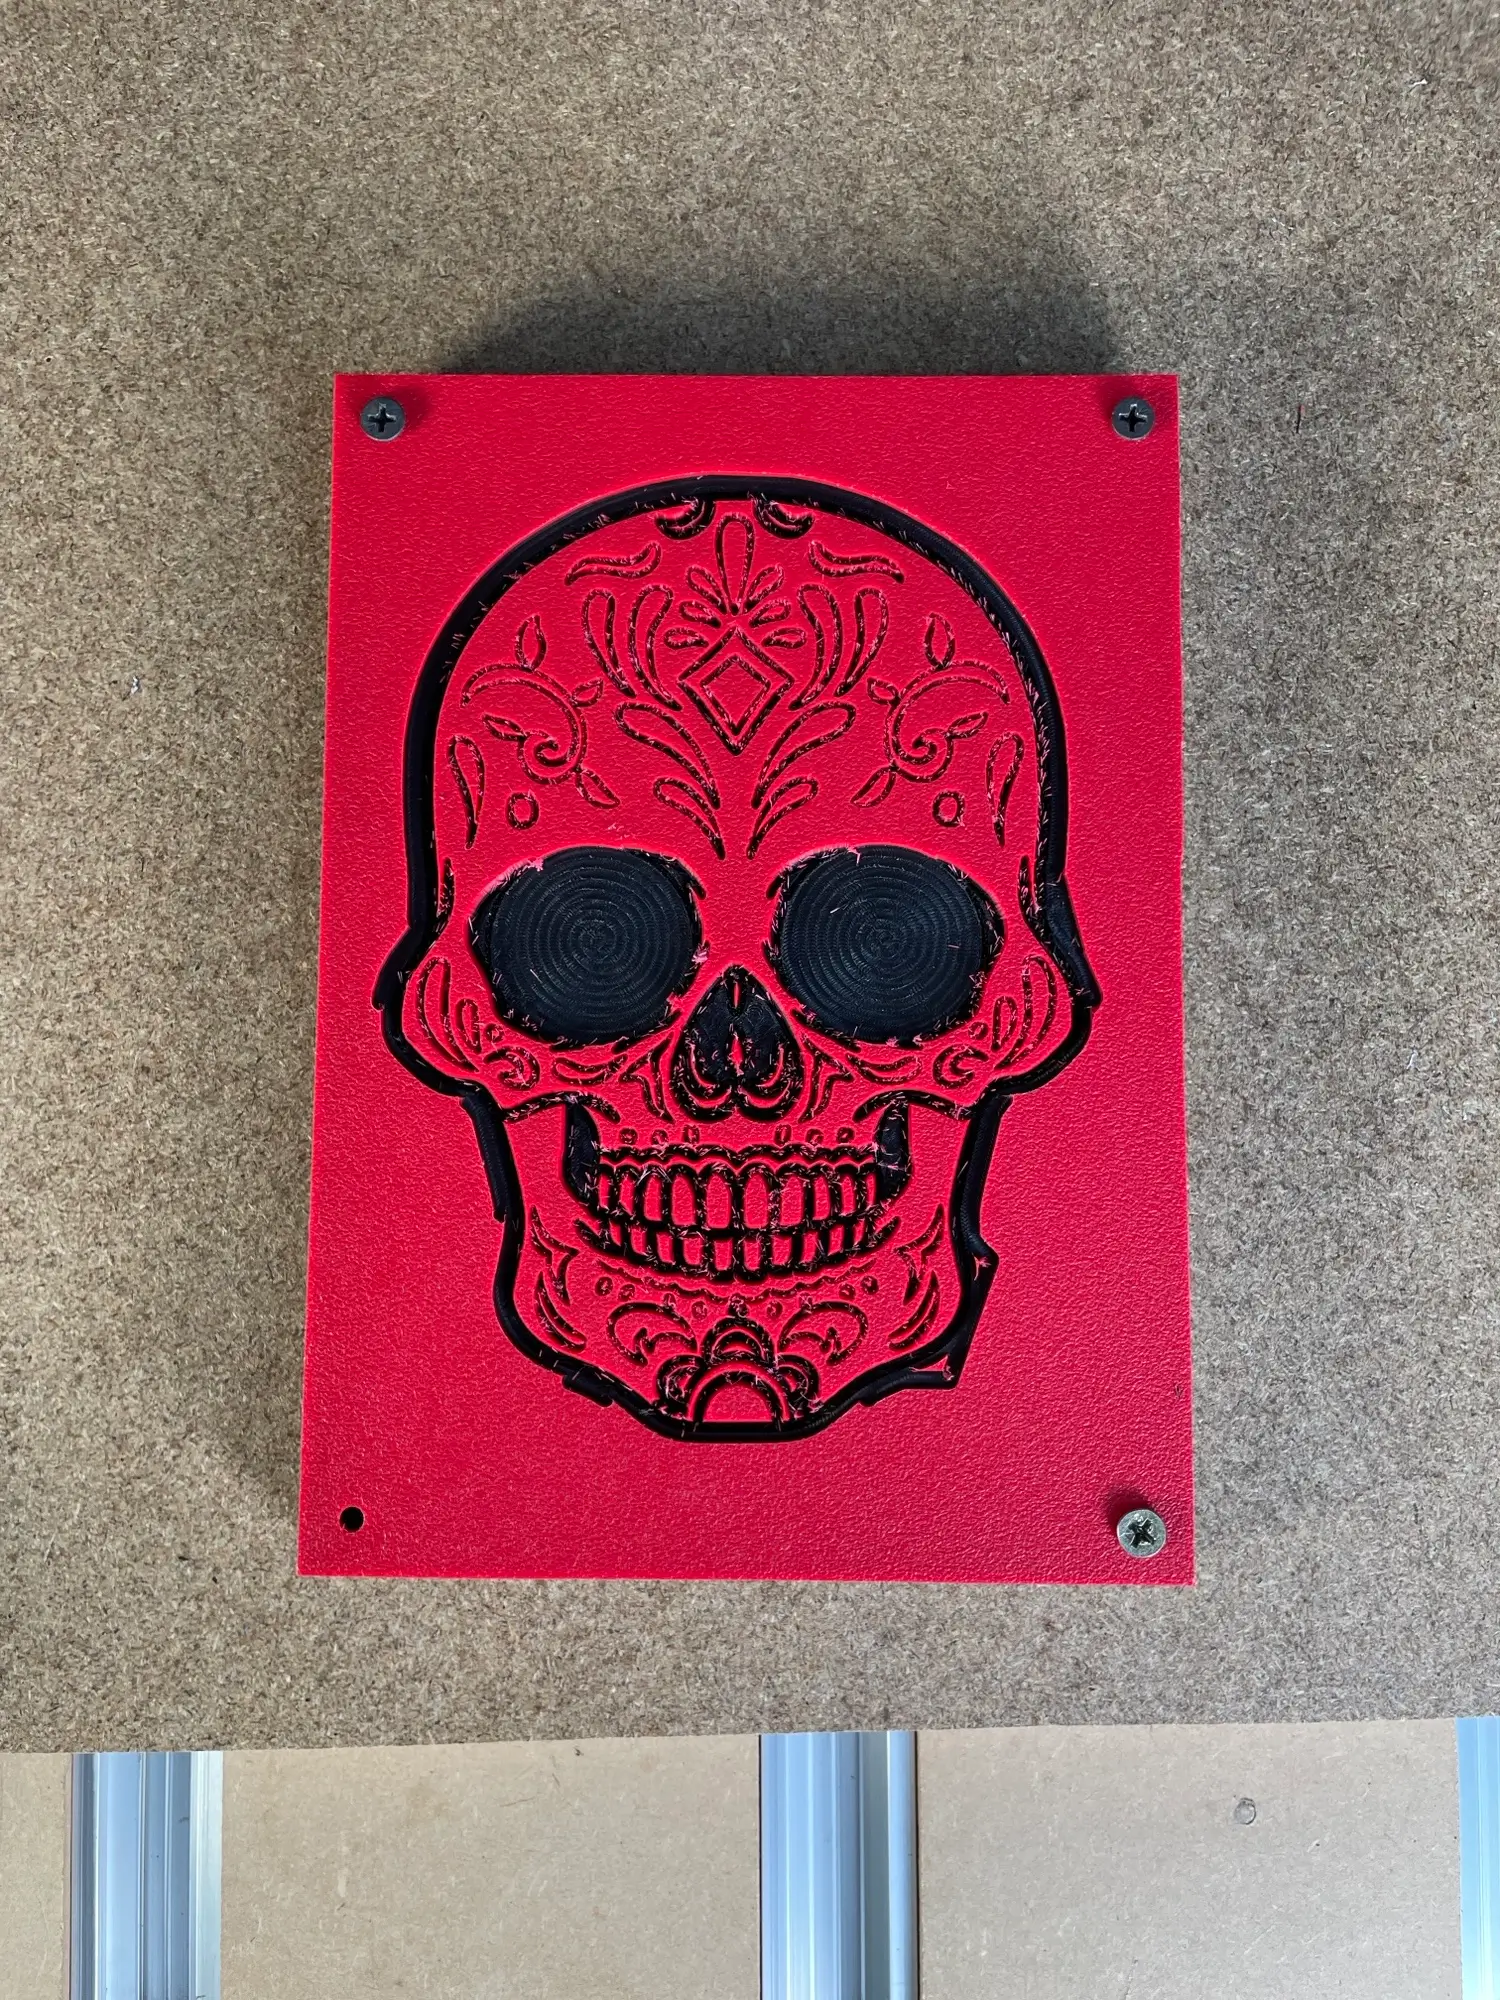 7. Flip the sheet, screw it down, then re-align the end mill on the bottom right hole, and zero the X and Y axes.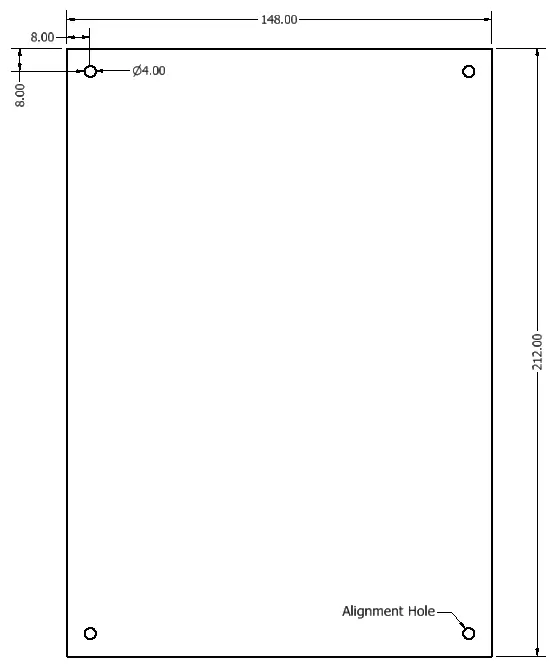
4 - 6mm Under 219.ncusing the 6mm end mill (#219)Step 5: Assembly and Final Wiring
1. Using the 6mm indents created on the back of the sugar skull, drill 4.5mm holes and tap with an M5 tap. The depth should be ~10mm, taking care not to pierce through to the other side.
2. Insert the bolts into the spacers and screw them into the tapped holes.
3. Remove display protective films, and slot the TFT displays and ESP32 into the cutouts in the back side of the skull.
4. Secure electronics with hot glue. Apply the glue around the edges to avoid damage.
5. Connect USB and test all functions.
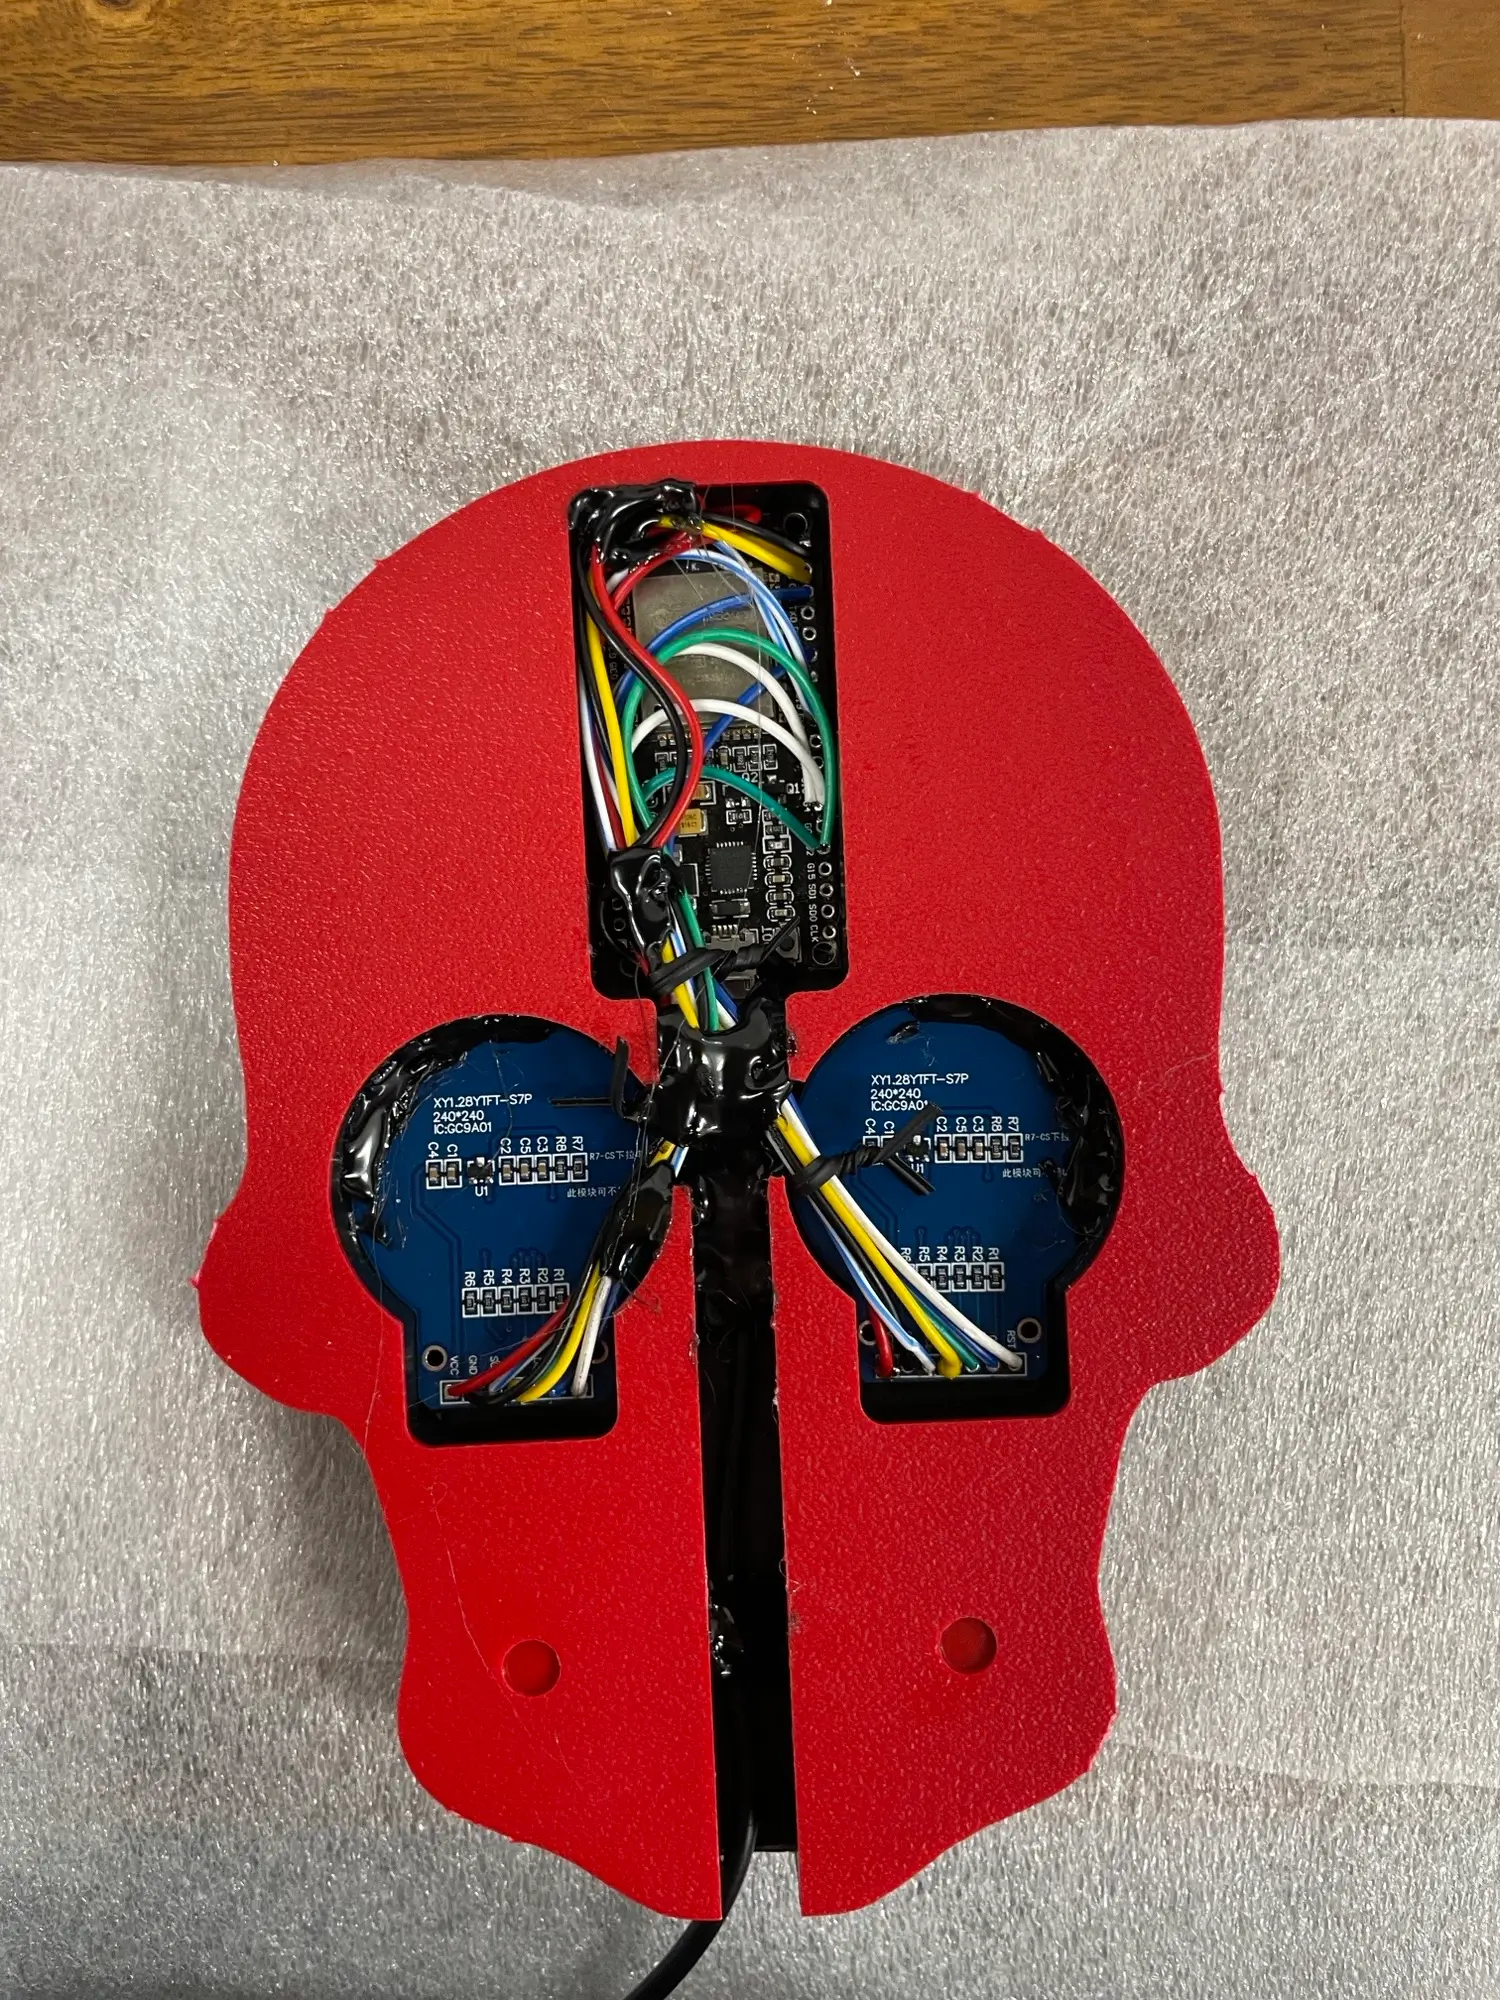
Enjoy your spooky, uncanny sugar skull!


